Category: In the Kitchen

  • Melt in Your Mouth Marshmallow Drops

    Baking away? Why not make time to whip up some yummy candies? This month all of our recipes are candy recipes. These are super for fun yummies to have for guests who drop in…or for the family to munch out on during movie nights…or even for Christmas gifts on a shoestring. Give these a try. You will love these!

    What You Need:

    1 (6 oz) pkg. semisweet chocolate pieces
    1 (1 oz) square unsweetened chocolate
    1 T butter
    2 eggs
    1 1/4 C confectioners’ sugar
    1/2 t salt
    1 t vanilla extract
    2 C peanuts
    2 C miniature marshmallows

    How to Make It:

    Place the chocolate pieces and the chocolate square into a heavy saucepan.
    Place the sauce pan over low heat.
    Add the butter and stirring constantly melt the butter and chocolate together until smooth about 4 minutes.
    Remove the pan from the heat and set aside until ready to use.
    Place the eggs into a mixing bowl.
    Use a fork and beat the eggs until they become frothy.
    Pour in the sugar, salt and vanilla extract.
    Mix until all the ingredients are incoporated together well.
    Pour the melted chocolate into the mixture and stir to incorporate.
    Fold in the peanuts and marshmallows.
    Cover a baking sheet with wax paper.
    Drop the marshmallow mixture onto the wax paper by a teaspoon about 1 in. apart.
    Place in the refrigerator for at least 2 hours or until firm.
    Store the candy in an airtight container in the refrigerator for up to 2 weeks.

    Serving Size:  4 dozen

    Always use the recommended size and type of pan when making candy.  A pan that is too small or too large can affect the cooking time of the candy.

    Don’t Miss Our Christ-Centered Christmas E-Book!

    https://cindyrushton.com/our-e-store/christ-centered-christmas/

    https://cindyrushton.com/our-e-store/christ-centered-christmas/

  • TEA-riffic Tips by Cindy Rushton

    Cindy2015Ever wanted to give tea a try? Well, today, I want to help make it DOABLE. Actually I want to encourage you to make tea a tradition in your home. This is an excerpt from my book A CUP OF TEA (Now available as an eBook and HALF OFF–see details below!!). Let me take you by the hand and help you get started making memories over tea…

    Sold!  Convinced! That settles it…you are ready to join the ranks of tea pals!  Only one problem is pounding away…you just do not have ANY idea of where to begin.  Beloved, this is EXACTLY why I have compiled this book.  You CAN begin right where you are.  If you need a little help, let me give you a few of my ideas and tips…

    Be SIMPLE!

    Tea does not have to be STUFFY!  Tea does not have to be FORMAL!  Use what you have on hand. Begin where you are.  You don’t have to be able to recite facts and trivia about tea and etiquette to DEVOUR the passion of tea.  Make your tea time a sweet tradition or ritual. It may be just afternoon tea after the little ones are tucked into bed for their afternoon nap. It may be a morning tea time (Oh, you CAN have coke in your cup while you take that morning quiet time!).  It might be a quiet moment before bed as you settle your mind.  It might be the whole family snuggled up with tea, cocoa, and goodies while you read aloud another chapter of the Bible and a chapter from a great read aloud!  Just bring tea home with YOUR very own style!

    Build Your Very Own Collection of Tea Goodies!

    You can find tea goodies just about anywhere! Take a look for the quaint goodies at yard sales, antique stores, auctions, flea markets, while traveling, at dime stores, gift shops, online…so on! Oh! You may want to take an inventory of what you already have tucked away in your cabinets. I am amazed at the little dishes, doilies, baskets, and other treasures that I had tucked away with no purpose in mind for them. Tea time is the perfect time to bring them out.  OH! And they do not have to match either! The most precious tea parties I have attended, whether formal or friend-to-friend, did not have one thing that “matched.” I am ever amazed at how each piece seemed perfectly “in place” and perfect for the occasion.

    Begin a Tradition by Giving “Tea” Gifts!

    Tea collectibles make perfect gifts for any occasion whether birthdays or holidays or just a little thank you. In fact, my favorite tea “goodies” have a sweet memory of dear friends!  You can give anything from teacups to teapots, from silver spoons to cookie cutters, from recipe books (with YOUR favorites already written inside!) to tea jewelry, so on!  My favorite way to give tea collectibles is to make a “Tea Basket” for those I love.  I fill it with goodies that they can keep AND goodies that they can eat/drink over their Tea Time!

    NO Tea Room in Your Area? What About YOUR Home???

    You are certain to have a perfect spot in your home for tea.  What about a drawing room? A living room? Your front porch? A gazebo? Your deck? The Garden? Fireside?  Outside by a big shade tree?  At the local park (for a Picnic Tea?)  Your bedroom? Your study? Around the kitchen table?

    Get Your Little Ones Involved!

    There is truly no greater place for children to learn the fine art of tea than at their mother’s knee.  From their toddling years, they can learn the etiquette and hospitality of tea as naturally as learning to eat.  If your children are like my children, they will develop a passion for the art of tea.

    How can you encourage that passion?  Allow your children to help prepare for tea time.  They can help to prepare the tea (instructions included on page 43–ALSO FOUND HERE: CLICK HERE) They can help to prepare the dainties.  They can help to select the teacups and linens.  They can even help get the classical music going and to get the latest read aloud out.  The key is to use your very best for your children—they are your very BEST friends!   If it is hard for them to handle your great big teacups, then you may want to get a miniature tea set that is perfect for their little hands and tummies!

    Don’t forget that tea is the perfect time to bring beauty into your home.  Share a great poem…a beautiful art print…a lesson on etiquette…or a chapter from your favorite read aloud!

    A Tea Time Blessing
    Unknown

    Lord, grant that our times
    Together be steeped in serenity,
    Sweetened by sharing,
    And surrounded by the warm
    Fragrance of your love.
    Amen

    Want to grab a copy of my book, A CUP OF TEA? You will LOVE IT! It can be found here at this link: CLICK HERE! Use the Coupon Code: CELEBRATE to save 50%! Yes! If you want to grab other things, please feel free to use the Coupon Code for those as well and save BIG!

     

  • It is FALL! Try Cindy’s Yummy (and EASY) Fruit Tea!

    It is FALL! Try Cindy’s Yummy (and EASY) Fruit Tea!

    The image “http://www.cindysdesktop.com/wp-content/uploads/Cookingwithmom.jpg” cannot be displayed, because it contains errors.There are recipes that I have used over the years that I just use occasionally. Then, there are staples to our diet. Then, there are ADDICTIONS! ha! 
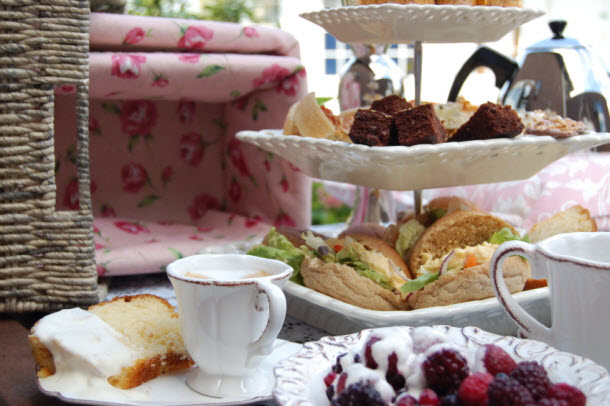
    Ok…this is obviously an addiction, but a yummy one-if you ask me. We make this one in bulk and have it on hand year-round. It is a nice afternoon hot tea. A wonderfully refreshing mid-day iced tea. A wonderful treat at bedtime while you read aloud books to your little one. It is even perfect to carry in a thermos to the park or to a friend who is needing a mom-to-mom visit after birthing a baby, miscarrying, surgery, or just dire need of GIRL-TIME. Easy. Yummy. Give it a try!

    What You Need:

    2 quarts cranberry juice
    1 (6 ounce) can frozen lemonade
    3 pieces whole nutmeg
    1 (46 ounce) can pineapple juice
    2 cups apple juice
    1 ½ tsp. ground ginger

    What to Do:

    Pour all juices in a crockpot or a big pan on the stove top.  Add spices in a cheesecloth. Simmer until you are ready to serve. Great hot or cold.

  • Let’s Make a Memory…Over Tea! by Cindy Rushton

    Let’s Make a Memory…Over Tea! by Cindy Rushton

    Cindy2015A cup of tea???

    Tea…What comes to your mind?

    As I think back over the years since that first cup of tea, I think beyond the various types of tea…the beautiful tea rooms and homes that have welcomed me for the ritual…the unique cups and teapots, each with its own story…all those details blur. But, one thing brings me back to “tea” over and over again…relationships! Relationships forged over moments shared over a cup of tea. Sweet, sweet memories that forge forever relationships.

    My very first memories of tea were on the front porch, truly Southern Style with Iced Sweet Tea. There was never a meal served or a family gathering without plenty of Iced Sweet Tea. Just visiting Mamaw, I could always expect a big, tall glass of Sweet Lemon Tea whether we were working in her kitchen or swinging on the front porch enjoying her flowers and sweet conversation.

    My very first cup of hot tea was typical Southern Style as well. At the end of my first year of homeschooling, I spent a wonderful day with a dear fellow homeschooler. We were preparing dresses for her to hand-smock for her youngest little girl. Her precious pre-teen came in mid-afternoon to ask if we would care for any tea. Being the TRUE Southerner that never passes up a great cup of tea, I said, “Sure!” She went on preparing tea, as was usual in her home. When she brought it out, I had to ask for directions on how to “take tea.” That moment my true love for tea was born!

    Since that moment, I have developed a true passion for ANYTHING to do with tea of ANY kind! I love the different types of tea. I love the books that all share little tidbits about the fine art of tea. I love collectables that each have a story to make them more and more endearing. I love the recipes for goodies that make a nice addition to ANY day. I love the versatility of tea for all ages, all settings, all occasions. Want to see me in pure bliss? Take me to a tea room! But, most of all, I love the many sweet, sweet relationships and precious memories that have been forged over cups of tea, both hot and cold!

    Tea truly meets us right where we are. If we love to collect antiques, we can’t help but to fall in love with the little dainties that are hidden away in all of the antique stores around. If we are looking for a healthy treat, none can be greater than tea! If we want to take a moment away with our children to build relationships and memories, tea is a must! If we want a perfect touch to a holiday, tea makes the day. If we want a theme for a party, tea always step forward with its touch of femininity. If we just want to minister to a friend or relative, tea ministers to their belly while “we” pour forth into their heart!

    My prayer is that you will see the beauty, grace, encouragement, tradition, and fun that is awaiting you. I pray that you will find that touch of tea. I pray that you will make sweet memories with those you love the most, over a cup of tea.

    So, my friend, do you hear the call beckoning to you? Take a moment, pour a hot steamy cup and come apart with me…

    …it is time to make a memory over a cup of tea!

    With Love, Cindy

    “You prepare a table before me…my cup runs over.”
    Psalms 23: 5 Amplified Bible


    Ready for Tea? Let Cindy Help! Grab her best-selling book, A CUP OF TEA. Includes her easy recipes and fresh ideas for your tea-time!

    [wp_eStore_fancy2 id=2]

  • Accident Proof your Egg Decorating

    Cindy2015Getting ready for Easter? I LOVE this time of the year. I LOVE Easter! Just the word brings back a flood of memories from my childhood AND all of the sweet memories that were made with my children through the years. Even now, with the empty nest, we will have everyone coming home again next week for celebrations. Yes, even EGG DECORATING! Fun, huh?

    Egg decorating is a must! For kids, dunking plain white eggs into a bowl and watching them turn a different color is almost magical. Even my grown children LOVE IT! The downside is the MESS. So, here are a few ideas to help minimize the mess this year.

    1. Try stickers. If you are not attached to the traditional method of egg decorating, this is a way to minimize the muss and fuss during Easter. Stickers make easy decorations. They leave nothing to clean up afterwards. And, there’s nothing tricky about it. Just purchase ordinary Easter stickers and stick them onto the eggs. Presto!

    2. Dye eggs at the stove. Avoid the mess that comes with sitting your children at the table with their own dipping cups. Mix the dye ingredients in a five quart Dutch oven. Wrap an apron around the child. Let the child take the dried boiled eggs and place them in the dye solution. When the eggs are ready, use a slotted spoon to lift the dyed eggs out of the pan. The slots leave less liquid on the spoon which means less liquid on the stove, the floor, you, and the kids. Spoon the eggs back into the carton. Place the cartons in the refrigerator until time to use them.

    3. Work on the kitchen floor. The lower you are to the ground, the shorter the distance a boiled egg has to fall. Spread an old vinyl tablecloth on the floor. Give each child an apron and a pair of exam gloves. The gloves can be purchased from any medical supply store. Gloves allow the children to dip the eggs with their hands instead of a spoon. When they have finished, have them take their gloves off and throw them away.

    4. Purchase a ready to use Easter egg kit. PAAS® has been making egg decorating materials for years. Each year they seem to come up with something that will make the egg decorating process easier and faster. They feature egg wrapping kits which create virtually no mess at all. The pre-formed pattern is ready for the decorator to transfer to the dried eggs. They also offer egg cups with their own dipper so you don’t need spoons at all. You can purchase PAAS® products wherever decorating items are sold, including most grocery stores and craft stores.

    Egg decorating is great for everyone, but no one likes to clean up at the end. Make it easier on yourself this year, Mom and Dad. Try these tips for some good clean fun. Make this week fun and filled with precious memories!

    Cindy2015Need MORE Help?

    If you need more help, don’t miss any of Cindy Rushton’s LIVE workshops that she will be teaching on these topics. She is scheduled to speak for many conventions, conferences, retreats, and Bible Studies. If you want for her to come to your area, message here today at CindyRushton@Gmail.com

  • Accident Proof your Egg Decorating

    Cindy2015Getting ready for Easter? I LOVE this time of the year. I LOVE Easter! Just the word brings back a flood of memories from my childhood AND all of the sweet memories that were made with my children through the years. Even now, with the empty nest, we will have everyone coming home again next week for celebrations. Yes, even EGG DECORATING! Fun, huh?

    Egg decorating is a must! For kids, dunking plain white eggs into a bowl and watching them turn a different color is almost magical. Even my grown children LOVE IT! The downside is the MESS. So, here are a few ideas to help minimize the mess this year.

    1. Try stickers. If you are not attached to the traditional method of egg decorating, this is a way to minimize the muss and fuss during Easter. Stickers make easy decorations. They leave nothing to clean up afterwards. And, there’s nothing tricky about it. Just purchase ordinary Easter stickers and stick them onto the eggs. Presto!

    2. Dye eggs at the stove. Avoid the mess that comes with sitting your children at the table with their own dipping cups. Mix the dye ingredients in a five quart Dutch oven. Wrap an apron around the child. Let the child take the dried boiled eggs and place them in the dye solution. When the eggs are ready, use a slotted spoon to lift the dyed eggs out of the pan. The slots leave less liquid on the spoon which means less liquid on the stove, the floor, you, and the kids. Spoon the eggs back into the carton. Place the cartons in the refrigerator until time to use them.

    3. Work on the kitchen floor. The lower you are to the ground, the shorter the distance a boiled egg has to fall. Spread an old vinyl tablecloth on the floor. Give each child an apron and a pair of exam gloves. The gloves can be purchased from any medical supply store. Gloves allow the children to dip the eggs with their hands instead of a spoon. When they have finished, have them take their gloves off and throw them away.

    4. Purchase a ready to use Easter egg kit. PAAS® has been making egg decorating materials for years. Each year they seem to come up with something that will make the egg decorating process easier and faster. They feature egg wrapping kits which create virtually no mess at all. The pre-formed pattern is ready for the decorator to transfer to the dried eggs. They also offer egg cups with their own dipper so you don’t need spoons at all. You can purchase PAAS® products wherever decorating items are sold, including most grocery stores and craft stores.

    Egg decorating is great for everyone, but no one likes to clean up at the end. Make it easier on yourself this year, Mom and Dad. Try these tips for some good clean fun. Make this week fun and filled with precious memories!

    Cindy2015Need MORE Help?

    If you need more help, don’t miss any of Cindy Rushton’s LIVE workshops that she will be teaching on these topics. She is scheduled to speak for many conventions, conferences, retreats, and Bible Studies. If you want for her to come to your area, message here today at CindyRushton@Gmail.com

  • Gorgeous Centerpieces Kids Can Make

    When sitting down to Christmas dinner, all eyes go to the center of the table.  This is because there is a beautiful centerpiece there that was made by your kids.  Don’t spend money purchasing something elaborate for the holiday table this year.  Let the kids (with your help) do the honors for the family.  Here are some centerpiece ideas that are easy enough for kids to create.

    Decorative centerpieces can be crafted from items that you already possess.  Things that you use to decorate the house each holiday can be converted to an arrangement for the family dinner table.  Gather a few things and see what you and the kids can come up with.

    It’s possible that a string or two of lights can be spared.  What about a few sprigs of greenery?  Put some of those on the table.  No one ever uses every single ornament on the tree.  Get the kids to pick the ones they like and add them to the stockpile.  Wire bows, wrapping paper, small boxes, and candles are good items for centerpieces.  If you don’t have any, invest in some decorative flat marbles that are frequently used in flower arrangements.  That should be plenty to get started with.

    When most people think of holiday centerpieces they see candles and greenery.  Try them together and separately.  You will need a platter or a charger plate for the base of your centerpiece.  Charger plates come in holiday colors and compliment whatever you decide to put on them.

    Candles can create a centerpiece all by themselves.  Let the kids choose candles of various sizes and colors.  Let them mix the heights and colors of the candles however they choose.   As an accent have them place colored marbles between and around the candles.  The light will sparkle off the marbles when the candles are lit, creating a pretty glow.

    Greenery looks rather plain all by itself.  To spruce it up, add a string of colored or white lights.  A touch of sprayed on snow can be added to the tips as well to give it more of a winter feel.

    How about adding some glittery ornaments?  Red ornaments resemble large shiny holly berries sitting atop the greenery.  Ornaments can be arranged in a glass bowl with miniature pine cones to create a different kind of centerpiece.  Floating candles can also be placed in a bowl of water and lit during dinnertime.

    The ideas are plentiful when it comes to centerpieces for the holiday dinner table or coffee table.  Let the kids create as many as they can think of.  If you have more than you can use, give them away to friends and family to adorn their holiday tables as well.

    Don’t Miss Our Christ-Centered E-Book!
    Learn more here Recipes, ideas, encouragement to help you make your Christmas the very best ever! All centered around Christ and family!

  • Fun Food Crafts with Kids!

    What’s better than a cute craft made by your child?  A cute craft made by your child that you can eat, that’s what.  Most kids like to cook.  When you are baking cookies or cakes, they want to help.  And no I don’t mean just licking the batter bowl.  Strap a kid-sized apron on them, grab a stool and get ready for some fun family time.

    Edible crafts are a hit with family members, teachers and friends too, so you can never make too many.  Here are some ideas for edible crafts that your kids can help you to make.

    Chocolate is a good choice for treats all year ’round.  For the chocolate lovers in your life, create chocolate stirrer spoons.  These spoons can be used in hot cocoa or coffee for extra sweetness.  To create your sweet stirrers, you’ll only need a few ingredients and cleanup is a snap.

    First, pile a bunch of plastic spoons with melted semi-sweet chocolate and let them cool.  Then wrap the tops of the spoons in colorful bags or festive cellophane and tie with a twist tie.  The chocolate spoons can be added to gifts of coffee, mugs, kitchen baskets, or placed in Christmas stockings.

    Candy canes can decorate your tree or you can decorate them and give them away.  Turn that candy cane into a reindeer by adding pipe cleaners, a nose, and felt ears.  Lay them down and glue a box of candy on top to create a sleigh.  Take several different flavored candy canes and tie them with a wire bow to create a candy cane bouquet.

    Enlist your child’s help when baking holiday cookies too.  Red hot candies or M&M’s can be added to make faces on Santa or reindeer cookies.  Christmas tree cookies can be frosted with green icing and candy sprinkles for lights.

    Christmas is the time that many bakers make gingerbread houses.  Gingerbread kits contain everything needed to bake and assemble the house.  Kids will need your help to put the pieces together, but they can add the icing, gumdrops, and other candies to the house.  Covering the gingerbread house with a protective coating will help preserve it over the Christmas holiday.  If the kids decide to eat it, forget about the coating and dig in.

    An alternative to gift tags would be to create cookie gift tags.  The cookies are baked and then a hole is made in the top center while they are still warm.  The recipients name is written in frosting on the cookie and attached to the gift with curly ribbon.  To keep the cookies fresh, seal the cookie tags in plastic bags after they are attached to the top of the gifts.  Wait until the night before Christmas to attach them so the ants don’t enjoy them first.

    Food crafts are tasty and oh so much fun to make.  Creating them gives kids a chance to get in the kitchen and learn all about the art of baking and allows you to relieve yourself from some of the stress that all that cooking can cause when you are doing it alone.


  • Non-Edible Gifts by Cindy Rushton

    Excerpted from Cindy’s best selling Christ-Centered Christmas 

    * Spicy Cinnamon Sticks…Gather a bunch of extra long cinnamon sticks and tie with a holiday ribbon and a sprig of holly or baby’s breath.  Cute to hang on the tree, sit around, and place on gifts instead of a bow!

    * Painted Wooden Ornaments…
    Purchase pre-cut wooden Christmas cutouts that are pre-painted.  Tie with gold, green, or red thread and use on the tree or as necklaces.  Hot glue a pin on the back to wear as a holiday pin!

    * Cookie Cutter Ornaments…Purchase metal cookie cutters and tie bright holiday ribbon through the top!  Easy, Inexpensive, and Precious Gift!

    * Recipe Book…It could be just holiday ideas like this one or it could be a collection of all the treasured family recipes.  It could be a collection from all relatives’ submissions.  Be imaginative!  Be sure to keep a copy for your daughters!

    * Pictures…Frame a special drawing from the children!  This is sure to be a hit!

    * Books…Try your hand at creating books complete with your own original story and illustrations…This is an EXCELLENT school activity!

    * Handprint Wallhanging or Sweatshirt…Place bright paint in pie pans (acrylic for burlap wallhanging or fabric paints for sweatshirt).  Have each child put his handprint on material.  The following verse can be painted or attached:

    Although we are sorta small
    And leave our fingerprints on the wall,
    This will help you remember the way
    Our fingerprints looked on Christmas Day!

    For wallhanging, put a thin dowel rod across the top.  Tie yarn as a hanger.  Fringe the bottom, and you have a fun, sweet gift!

    Don’t Miss Our Book Christ-Centered Christmas! Available in Ebook version!  

    Grab Cindy’s books and audios for HALF OFF! Just use the coupon code: ALLTHINGSNEW

  • Christmas On a Budget by Tawra Kellum

    Tawra's Family

    Between high gas prices and consumers’ fears of a financial squeeze, it seems as if a nice Christmas is out of the picture this year. Not so says Tawra Kellam, editor of Living-on-a-Dime.com. To prove it, here are a few of her ideas from to help make Christmas memorable without breaking the bank!
    Go Potluck! You buy the turkey — Have everyone else bring the side dishes and drinks. Turkeys in our area are .39/lb this time of year. If you buy just the turkey, it will only cost you about $5-$10 to feed everyone for a large family gathering.

    Celebrate Christmas the week after Christmas. Take advantage of the after Christmas sales and plan your large extended family gathering for the week after Christmas. Besides being less expensive, it is unlikely to interfere with anyone else’s Christmas plans.

    Don’t give gifts or give inexpensive gifts to hairstylists, babysitters, teachers and others. I found several wonderful small scented jar candles on clearance for .25 each. I will put three of them in a small basket (purchased at the thrift store for .25) with some tissue paper, ribbon and nice note. A great gift for $1.25!

    Break up gift sets. If you find an item that comes in a gift set at Christmas, give parts of it to different recipients. This is great for bath or perfume sets.

    Yard sales and thrift stores equal great savings. You can find a lot of new or nearly new items for pennies on the dollar.  For our son, we found a working telescope in the box. It cost $1.00, so we saved $24!  He got what he wanted and we didn’t have to take out a home equity loan!

    Make memories, not more junk. Most kids get more than plenty for Christmas from grandparents, aunts and uncles. If you can only afford one gift for your child, make it a memory! Wrap a note in a box with instructions for a treasure hunt. Send your child all over the house with clues and then have the real gift sitting under the tree when they return. Simple, but a great memory for them!

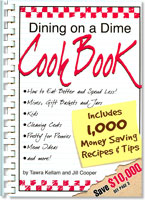
    Dining On A Dime e-Book - Eat Better, Spend LessMy favorite book!

    NOW AN EBOOK! AND ON SALE!!!

    Dining On A Dime Cookbook: Eat Better, Spend Less! (e-Book version) $19.95 – Sale! $10.00 (this week–click here!)

    Without cutting coupons! Unbelievable? It really is possible!

    The award winning Dining on a Dime is packed with over 1,200 money saving recipes and tips, kids tips and snack ideas, gift baskets, menus, food storage directions, Cleaning Cents and Pretty for Pennies.


    Jill Cooper and Tawra Kellam are frugal living experts and the editors of Living-on-a-dime.com/. As a single mother of two, Jill Cooper started her own business without any capital and paid off $35,000 debt in 5 years on $1,000 a month income. Tawra and her husband paid off $20,000 debt in 5 years on $22,000 a year income. Tawra and Jill teach thousands of readers each month how to save money on their grocery bill and get out of debt.